Guides
Clothing Photography: How to Photograph Apparel for Online Stores
Clothing photography for an online store: flat lay, ghost mannequin, on-model, and lifestyle, plus garment prep, the shot list, and what Amazon actually allows.
Clothing photography is four jobs wearing one name. A flat lay, a ghost mannequin frame, an on-model shot, and a lifestyle image are not four styles you pick between on taste. They answer four different buyer questions, they cost wildly different amounts, and the marketplace you sell on may accept some and reject others. Choosing wrong is how a store ends up with a gallery full of pretty pictures that still cannot tell a shopper whether the sleeves will be too short.
This guide covers how to photograph apparel for an online store: the four methods and what each one proves, how to prep a garment so the photo is accurate rather than merely attractive, the lighting and background setups that work, the shot list and the platform specs behind it, and when handing the whole thing to a studio is the cheaper answer. Every platform requirement below was checked against the platform's own published documentation in August 2026, and the ones that contradict each other are flagged rather than smoothed over.
How to do clothing photography: the four methods that cover a store
Start by mapping methods to questions rather than to budget. A shopper looking at a jacket wants to know what it is, what shape it holds, how it fits a body, and whether it belongs in their life. Each method answers exactly one of those well and the others badly.
| Method | The question it answers | What it costs you |
|---|---|---|
| Flat lay | What is the cut, color, and detail? | Cheapest. A surface, a light, a camera overhead. |
| Ghost mannequin | What shape does it hold when worn? | A mannequin, a second frame, and compositing time. |
| On-model | How does it fit, drape, and sit on a real body? | Most expensive. Model, styling, studio, usage rights. |
| Lifestyle | Who wears this, and where? | Location, styling, and creative direction. |
The evidence points the same direction for anything worn. Baymard Institute's usability testing found that plain cutout images against white are not enough for users to judge products designed to be worn, because fit and length cannot be read off a flat shot, and it puts mannequins and CGI models in the last-resort category. Their apparel benchmark tracks the same gap on live sites: 21 percent of apparel sites provide no human-model images at all, or only one, which is not enough for a shopper to evaluate.
That does not make flat lays worthless. It makes them slot two.
Flat lay clothing photography
Flat lay clothing photography means shooting the garment laid flat, camera directly overhead, usually on white or a plain neutral surface. It is the fastest method per SKU and the most forgiving of a small space, which is why it dominates for accessories, kidswear, socks, basics, and any catalog with hundreds of items and a tight turnaround.
Three things separate a usable flat lay from an amateur one. Square the garment so the shoulders are level and the placket runs straight down the frame center, because a crooked lay reads as a crooked garment. Shoot from directly above rather than at an angle, since perspective distortion makes the near end look larger and quietly misrepresents proportion. And give the garment a little dimension, either by tucking tissue or foam under the shoulders and sleeves, or by pinning the back, so it does not read as a deflated shape.
On-model and lifestyle
On-model is the shot that answers fit, and it is the one shoppers actually want. The academic work supports the direction without supporting the inflated conversion numbers that circulate: an experimental study in the Journal of Research in Interactive Marketing compared flat, mannequin, and human-model presentations and concluded that images with human models belong on the product page, where the shopper is analyzing the item before deciding. Note what that is not. It is not a percentage conversion lift, and the widely quoted figures for those (58 percent more sales from multiple angles, 30 percent from on-model) trace back to vendor blogs citing each other with no locatable study behind them.
Lifestyle is a separate job again. It positions the garment rather than describing it, which means the setting has to match the customer you actually have. Lifestyle frames earn their keep in ads, email, and the middle gallery slots, and they are usually the wrong choice for slot one, where a shopper is still trying to see the product.
What clothing photography is called: apparel photography, garment photography, fashion product photography
There is no governing body that standardized this vocabulary, so studios and platforms use several names for overlapping things. Apparel photography and clothing photography are used interchangeably, including by the platforms themselves: Amazon's guidance for this category is titled image guidelines for clothing, and Shopify publishes its own guide under clothing photography. Fashion product photography usually signals the ecommerce end of the work, catalogs and product pages, while fashion photography on its own tends to mean editorial and campaign imagery where the clothes serve a mood.
Garment photography turns up in prose more than on rate cards, and it usually just means the same catalog work described from the maker's side. Ecommerce fashion photography is the phrase studios use when they want to be explicit that the deliverable is listing images rather than a magazine spread. If you are briefing a photographer, the useful precision is not the label but the method: say flat lay, ghost mannequin, on-model, or lifestyle, plus how many angles per SKU.
Source-photo setup and garment accuracy checks
The most expensive mistakes in clothing photography happen before the shutter. A wrinkled garment and a color that shifts two shades toward blue will survive every retouching pass you throw at them, and the second one comes back as a return.
Garment photography starts with steaming, pinning, and prep
Steam every piece, including the parts you think are out of frame, because a crease on the shoulder shows up as a shadow. Lint roll dark fabrics under the actual shooting light rather than under room light, which hides most of it. Pin from behind to set the shape you want: pull the waist in, straighten a hem, hold a collar open. Clip excess fabric behind a mannequin so the garment reads as the right size rather than a size too large, but keep it honest, because a heavily pinned sample photographs as a fit the customer will not receive. Button and zip everything the way the product should arrive, and check the placket alignment in the viewfinder, not afterwards.
Color accuracy is the check that prevents returns
Returns are the reason to care. The National Retail Federation, with Happy Returns, put the 2025 retail return landscape at $849.9 billion, with an estimated 19.3 percent of online sales returned. Apparel sits at the high end of that, and color and fit surprises are a large part of why: the shopper who ordered sage and received olive is going to send it back regardless of how good the composition was.
Two tools fix this and they do different jobs. A gray balance card is a spectrally neutral surface, engineered by Calibrite to reflect equal amounts of red, green, and blue under any light, which makes it a reliable exposure and neutrality reference. A 24-patch color target goes further: the ColorChecker Classic is what you use to build a camera profile and perform real color correction, because it gives the software known values to solve against, not just a neutral point. Shoot one frame with the target in it at the start of every lighting setup, correct the batch to that frame, then pull the target frame from the delivery.
Then keep the color where you put it. Untagged images on the web are treated as sRGB by browsers per the W3C color specification, and Shopify strips embedded profiles on upload, so export web assets as sRGB. Amazon's own apparel guide asks for RGB rather than CMYK for the same reason, noting CMYK files display tonal variation on the site. Last check before you ship: pull the product page up on a phone, since that is where most of your traffic will judge the color.
Lighting and backgrounds for apparel
Clothing wants big, soft, and even. The practical rule is that the larger the light source relative to the garment, the softer the shadow edge, so a large softbox or a scrim close to the subject beats a small light far away. For flat lays and ghost mannequin work, two lights at roughly 45 degrees on either side, feathered so their edges overlap across the garment, gives you flat even coverage with no hotspot. Add a third light on the background if you need true white, because the backdrop material is not what makes the background white, the light on it is.
Texture is the exception that trips people up. Perfectly even light kills the weave on canvas, denim, knitwear, and anything with a nap, and those textures are exactly what a shopper is zooming in to evaluate. Kill one side, or bring a flag in close, so a directional gradient runs across the fabric. You want the garment evenly exposed and the surface still readable.
On backgrounds, the decision is mostly downstream. Pure white for anything headed to a marketplace main image slot. Light gray seamless for on-model work, because it separates white and cream garments that disappear against white and it stays neutral behind every colorway. Keep one background per category across the whole catalog, since a grid page assembled from three different grays looks like three different brands.
Reflective and dark garments need their own plan. Satin, leather, and sequins show every light source in the room as a specular highlight, so shoot them through a large diffusion panel with the lights well outside the frame. Black on white is the hardest combination in the category, and the usual answer is a rim or kicker light from behind to separate the silhouette from the backdrop.
Ghost mannequin photography, step by step
Ghost mannequin photography, also called invisible mannequin or hollow man, produces an image where the garment holds a full three-dimensional body shape with no body in it. It is the middle option in cost and the most common compromise in ecommerce apparel, because it shows shape and volume without a model shoot.
The technique is a composite, not a single frame. As PetaPixel describes it, the images are usually created by photographing the clothes worn from the front, then compositing that frame with a separate photograph of the garment turned inside out with the label facing the camera. The reason for the second frame is simple: when a garment is on a mannequin, the inner back neck is hidden, and without it the finished cutout has a hole where the collar should show lining. Retouchers call that seam the neck joint, and it is where cheap ghost mannequin work falls apart.
The sequence in practice:
- Dress the garment on the mannequin, pinning from behind to set the size and shape you want to represent.
- Shoot the front on a locked-off tripod, marking the position so nothing moves between frames.
- Shoot the inner back neck as a second frame, either on the mannequin turned around or with the garment laid inside out, under the same lighting.
- Cut the garment out of the first frame, drop in the inner neck from the second, and rebuild the collar opening so the lining reads at the right depth.
- Add a soft contact shadow. Without one the garment floats and the image looks fake to shoppers who cannot say why.
Now the part most guides get wrong. Ghost mannequin is not universally accepted as a marketplace main image. Amazon's clothing and accessories imaging guide lists ghost mannequins and visible mannequins under main image don'ts, states in its glossary that mannequins are not allowed in product images, and says plainly that all adult apparel should be imaged on-model while kids, baby, accessories, and multipacks should be off-model. That document is stamped informational, and the 2022 style guide that replaced it drops the mannequin language entirely, so the two published guides disagree. The safe read for a seller: ghost mannequin is excellent for your own storefront and risky as an Amazon adult-apparel main image, and the binding answer lives in current Seller Central policy for your category, not in a blog post.
Cost is the other reason to think about it deliberately. Squareshot's published rate card puts clothing flat lay at $50 per image, ghost mannequin at $75, and a full-body model shot at $190, which is a clean picture of the tradeoff: ghost mannequin runs roughly a 50 percent premium over flat lay, and on-model is nearly four times a flat lay.
Getting on-model clothing photos without booking a model
The uncomfortable position most small apparel brands are in is that the shot with the best evidence behind it is also the one they cannot afford per colorway. A model shoot is a day rate, a studio, styling, and usage rights, and it has to be repeated every time you add three colors to a style.
The workable middle path is to shoot the garment properly once, then generate the on-model views from that source photo. It only works if the source is good, which is the whole reason the prep and color sections above come first: an accurate flat lay or ghost mannequin frame with true color and readable texture is the input, and a wrinkled phone snapshot under a kitchen light is not.
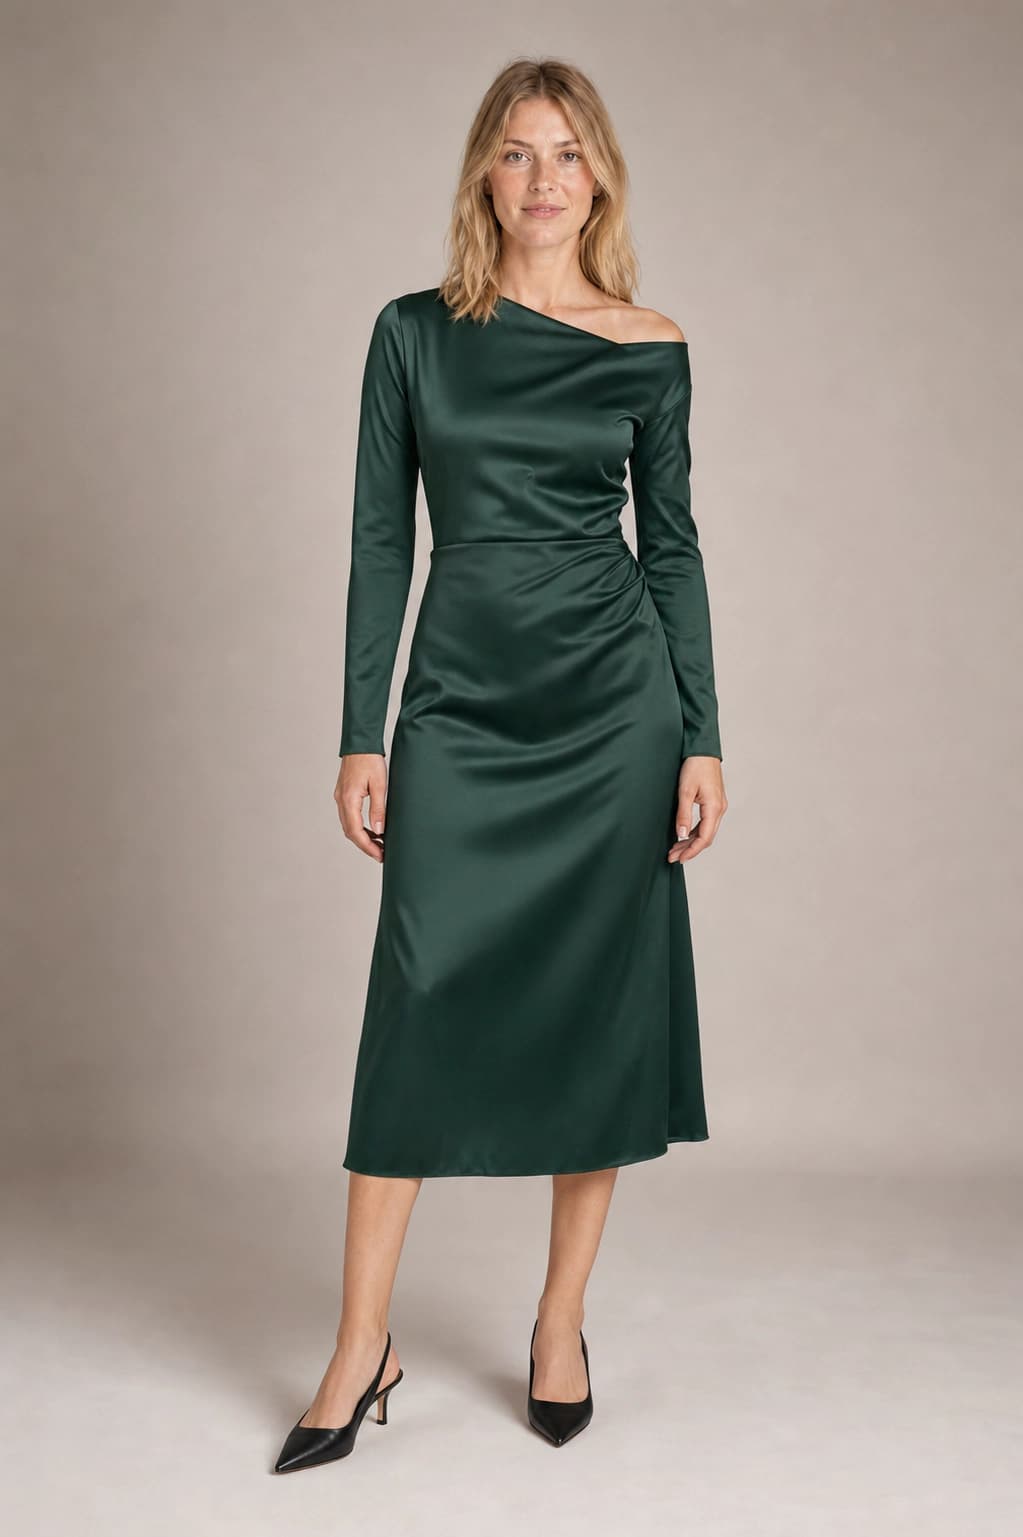
Both frames above came from this article's own production run: the flat lay was generated first, then the on-model version was derived from it, which is why the pocket shape, button count, and topstitching match. That is the same operation our AI virtual try-on runs on a real garment photo, and it is worth being precise about what it does and does not do. It is a visual try-on, not a sizing engine: it shows how a garment reads on a body, and it will not tell a shopper whether a medium fits them. Small logos, label text, and hardware can drift, so check them before publishing and keep your real photograph as the listing's main image.
Try it now
Free to try, no account needed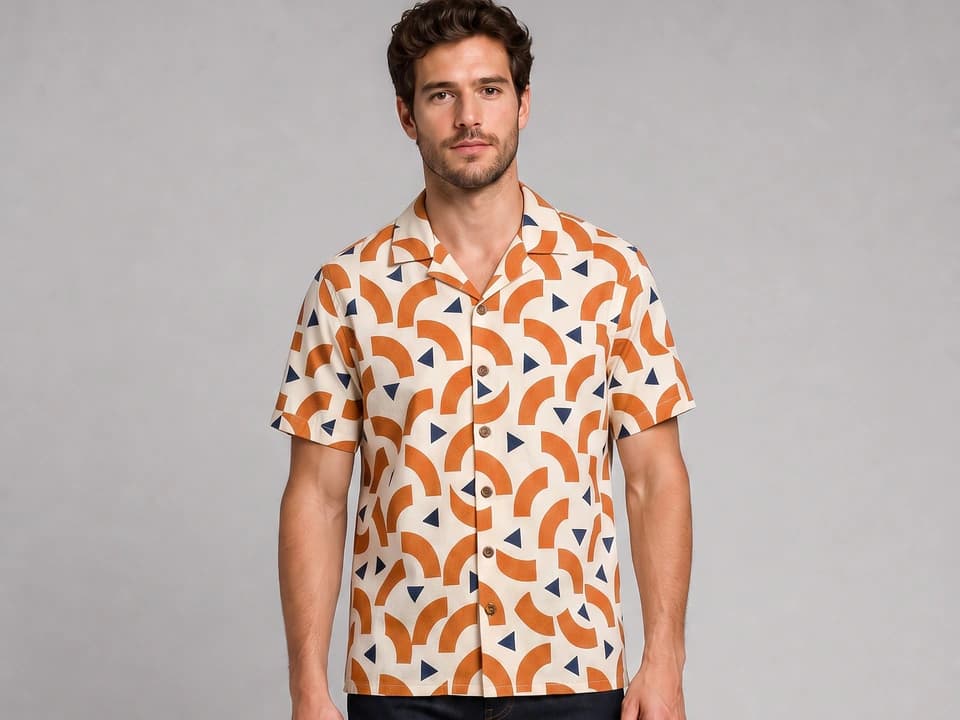 Example output
Your generated image will replace this example.
Two related jobs sit next to it. When you need a coherent model identity carried across a whole lookbook or campaign rather than a single garment placement, that is AI fashion photography, which holds one model's face and proportions constant while wardrobe, pose, and location change. When the item is not worn, an accessory, a bag on a table, or packaging, the equivalent workflow is AI product photography from a single packshot.
The clothing product photography shot list for an online store
Clothing product photography works as an inventory of buyer doubts. Six frames per style clears the usual ones, and the platform requirements decide which frame goes in which slot rather than your preference.
| Shot | The question it answers | Slot |
|---|---|---|
| Front, on-model or ghost mannequin | What is it and what shape does it hold? | Main image, thumbnails, feeds |
| Back view | What does the other half look like? | Second slot |
| Side or three-quarter | How does it drape and how full is the cut? | Third slot |
| Fabric and hardware macro | What is it made of, how well is it made? | Fourth slot, plus zoom |
| Detail of a selling feature | Pockets, lining, cuff, closure, print placement | Fifth slot |
| Lifestyle or in-context | Who wears this, and where? | Final slots, ads, email, social |
Add a size and fit reference wherever you can. Baymard's product page research finds in-scale images are the most commonly missing type across ecommerce, and for apparel the practical version is stating the model's height and the size they are wearing in the caption or description. It is free and it removes the single most common pre-purchase question.
The specs each platform actually publishes
These change, and several widely repeated numbers are wrong, so here is what the sources said in August 2026.
- Amazon. Main images need a pure white background at RGB 255, 255, 255 and the product must fill at least 85 percent of the frame, per the clothing imaging guide. Images must be between 500 and 10,000 pixels on the longest side, and zoom is enabled above 1,000 pixels. The 1,600 pixel figure repeated everywhere is a minimum height in the apparel guide, not the zoom threshold. The 2022 style guide gives different numbers again, 1,000 to 3,900 pixels and four to seven images per product, so check your category's current policy page.
- Shopify. Its help documentation says 2048 by 2048 pixels usually displays best for square product images, accepts up to 5000 by 5000 pixels or 25 megapixels, caps file size below 20 MB, and names PNG then JPEG as the best formats. The 4472 pixel maximum that circulates has no source in Shopify's docs.
- Google Shopping. The Merchant Center image requirements currently set a 250 by 250 pixel minimum for apparel products, with a new 500 by 500 minimum for all products whose enforcement begins on January 31, 2027. Promotional overlays, watermarks, logos that are not part of the product, and borders are all prohibited, and the product should occupy between 75 and 90 percent of the image.
One consequence worth planning around: the marketplace main image and your own storefront hero are different files with different rules. Anything with text on it, a size callout, a badge, a seasonal frame, belongs on your site and in ads, never in a marketplace main slot.
When to hire a clothing photography studio
Hire out when the math says so, which is more often than founders expect. Two published rate cards give a real range. Squareshot charges $50 per image for clothing flat lay, $75 for ghost mannequin, and $190 for a full-body model shot, with a $300 minimum order and day rates from $1,125. soona lists $39 per photo with a $149 booking fee, ghost mannequin styling from $129 an hour, and full-body models from $159 an hour. At the volume end, studios advertise as low as $12 per image. Treat those as the shape of the market rather than a benchmark, because no trade body surveys these rates.
Against that, price your own time honestly. A competent in-house setup means a mannequin, two lights with large modifiers, a backdrop, a tripod, a color target, and enough retouching skill to build a clean neck joint. That is a real capital and learning cost, and it pays back only at volume or with frequent drops.
The dividing lines that usually decide it:
- Hire a studio for launch collections, hero campaign imagery, anything where a real human model's presence is the point, and any category where you need a hundred SKUs consistent by a fixed date.
- Shoot in house for restocks, colorway additions, marketplace refreshes, and any catalog where turnaround matters more than polish.
- Generate the variations around a real source photo: additional model views, colorway swaps you have already shot once, seasonal lifestyle backgrounds, and paid social crops. Keep the photograph as the listing's source of truth.
The short version
Shoot the garment accurately once. Steam it, pin it, light it big and soft, and correct color against a target rather than by eye. Decide the method by the question you need answered, not the budget you wish you had, and remember that for anything worn, a flat cutout alone leaves the fit question open. Check the destination's published spec before you export, since Amazon, Shopify, and Google Shopping each want something different and at least two of them contradict their own older documentation. Then use generation for the volume work around that source photo, and keep the real photograph where the shopper decides.